

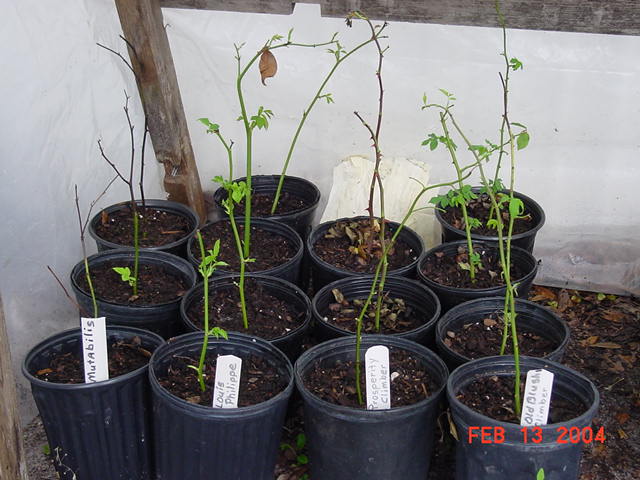
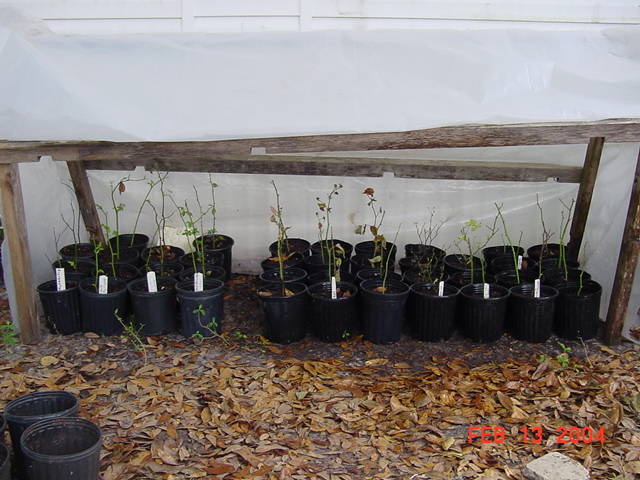
My first attempt at rose propagation came in 2004 when I first really started getting into growing plants. I had a lot of free time on my hands, and being a rose lover wanted to grow some roses that were problem free. Enter the antique garden rose. I used to frequent the GardenWeb forums, and they had a wonderful antique rose forum that is full of wonderful information and wonderful people. That’s where I found someone that was offering free cuttings. After some brief discussion the kind lady sent me numerous cuttings via the USPS. They arrived in ziplock bags wrapped in damp paper towels. I wasn’t sure what to do with them but after a little research I decided to build a mini greenhouse outside, plant them in a soilless medium and mist twice daily. From this primitive method I attained 6 new roses. Not a very high rate of success but I did accomplish what I set out to do. This could almost be compared to the “Stick in the Mud” method and in reality is not very effective.Fast forward a few years to 2007.
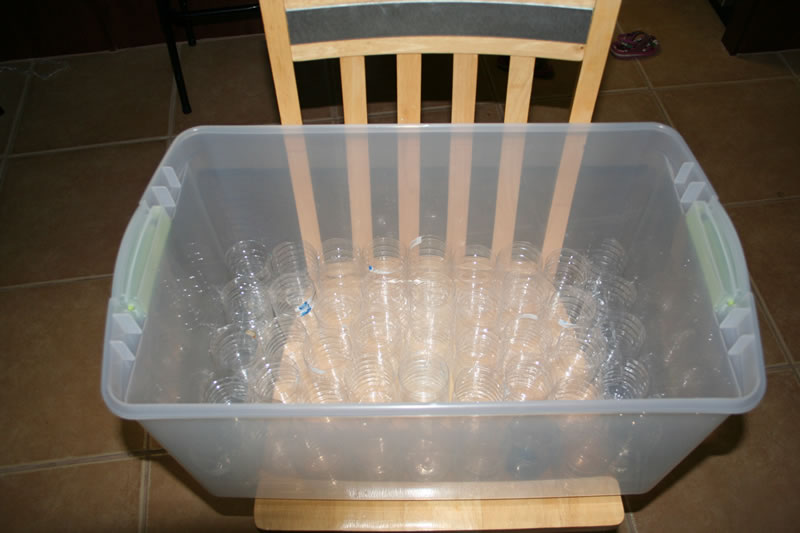
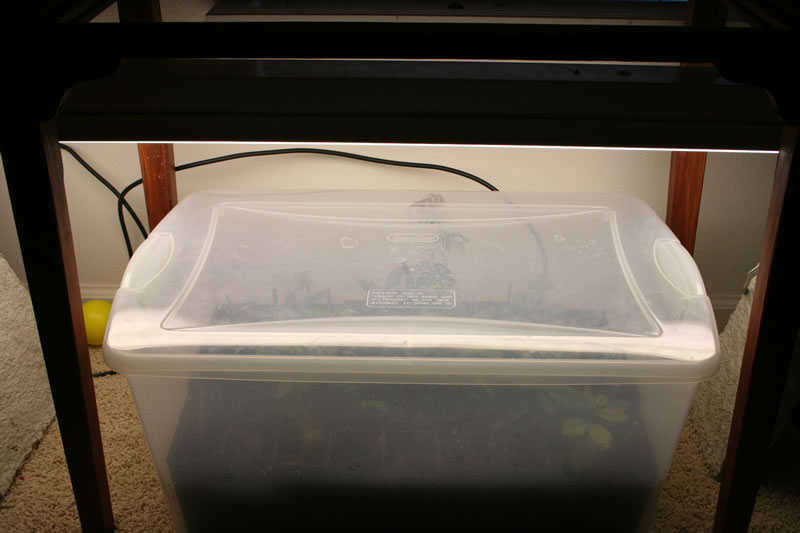
After watching those 6 roses grow and develop and after listening to my wife complain about not enough color in our landscaping I decided it was time to try my hand at rose propagating again. This time I was armed with more knowledge and was determined to improve my technique and increase my production. My first attempt this time at rooting rose cuttings was the 2 liter soda bottle method. Basically you cut the top off a 2 liter bottle, put some drain holes in the bottom, fill it about half way with your propagation medium, then tape the cover back on. What this does is creates a greenhouse effect, keeping moisture and humidity in, which is essential to ensuring success. However, my temperature outside here in NE FL was simply too hot right now and the results were dismal…none survived. My second attempt at rooting rose cuttings this involves making a mini-greenhouse using a large clear storage bin. The cuttings were then taken, put into small planters and placed into the storage bin. Then the cover was put on the storage bin was placed underneath a set of florescent lights inside my house, where the average temp stays about 75 degrees F. I got the idea from a Canadian hybridizer named George Mander who achieved nearly 100% success using a similar setup in his basement. Here’s how I did it.
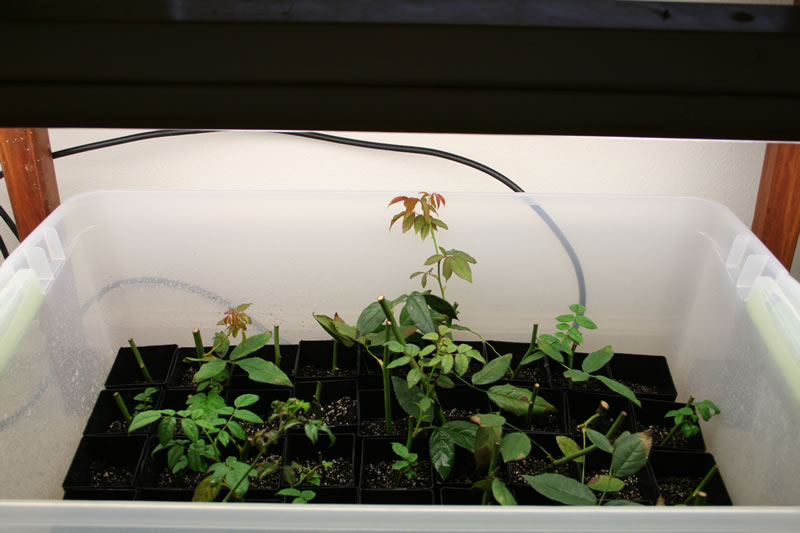
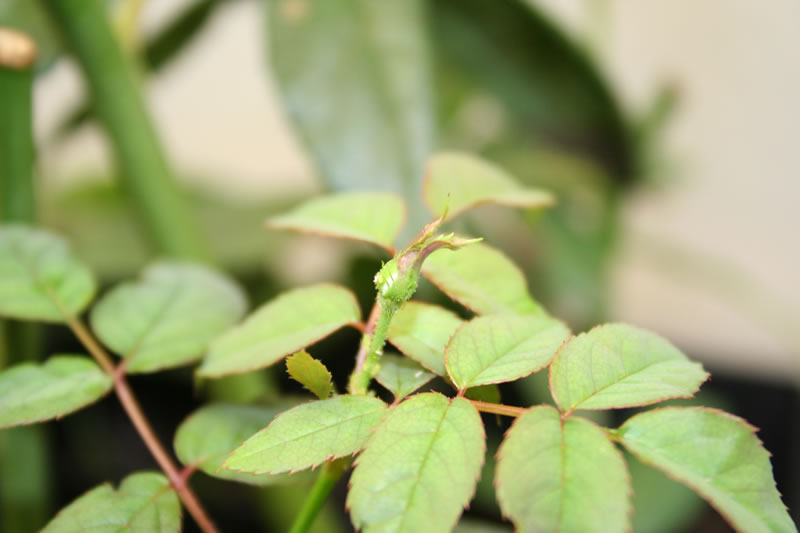
By far this has been the most effective method for me to root my antique garden roses. What I have done essentially is made a mini greenhouse using a large, clear sweater box purchased from my local box store retailer. Then using old water bottles or actual small plant cups, I placed filled them with my 50/50 peat and perlite mixture, then placed the prepared cuttings into the containers. After all the cuttings were prepared, they were then misted, the lid placed on top of the sweater box and finally under the florescent lights. The lights were placed on a simple trip timer to give the cuttings light for 16 hours every day. The cuttings were also misted at least once daily (except when I went on vacation). All this is inside my house upstairs where the temperatures is kept around 75 degrees F, since my Canadian hybridizer friend George Mander told me that I would achieve greater success with temperatures cloder to 70 degrees F. I was able to fit 45 containers in the first batch that I started on July 2nd, 2007. 10 weeks later I had only lost 7 cuttings, with half those my fault. Of the remaining 38 cuttings, several had phenominal growth, and one was even budding! I honestly never expected flowers on these cuttings until the following spring, so this to me was just an added bonus.
Now fast forward today. Of the rose varieties I propagated a decade or so ago, three survived and are performing well in my NE Florida landscape. One in particular does so well with little to no maintenance that I’ve decided to start propagating them again. However, this time I will be setting up a mist propagation system in my attached greenhouse. Should be interesting to see how week this works, not only for my roses but for my camelia japonica and mulberry tree as well.
Update to follow once it’s set up and operational….

Recent Comments